|
|
|
|||||||||
|
|||||||
| Arts, Creativity, Sigs, & Avatars Movie Production, Artwork, Animations, Sounds and other creative things to do with Pixie Hollow and Disney. |
 Art improvement (oh well... maybe a little bit improvement)
|
|
Login or Register now to see less ads. |
 |
|
|
Thread Tools | Display Modes |
|
#76
 12-27-2016, 09:15 AM
|
||||
|
||||
|
Dandelion is beautiful, and so full of character. I could imagine her being on a front cover of her own storybook.
Did you use coloring pencils, or is this a digital drawing? I like the soft, pencil-like effect that you used. 
__________________
|
|
#77
02-27-2017, 10:43 AM
|
||||
|
||||
|
I finally able to improve myself!
Hi, Princess Belladonna. 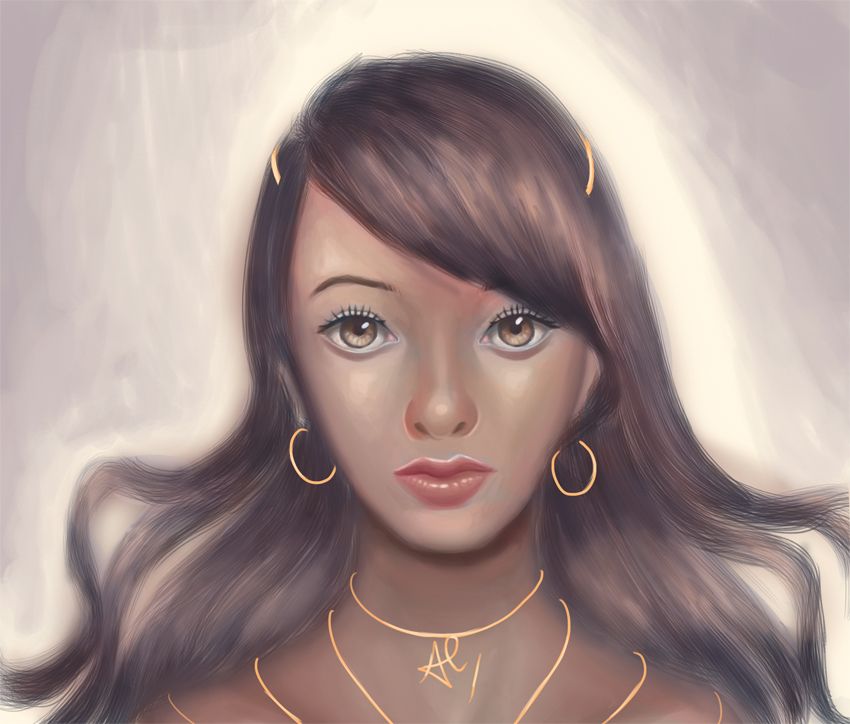 Right now I'm busy in school exam and animation task from my friend, so I might not publish some art for awhile. |
|
#78
03-15-2017, 05:40 PM
|
||||
|
||||
|
Whoops did I miss something??
Quote:
--- No... I have to post something 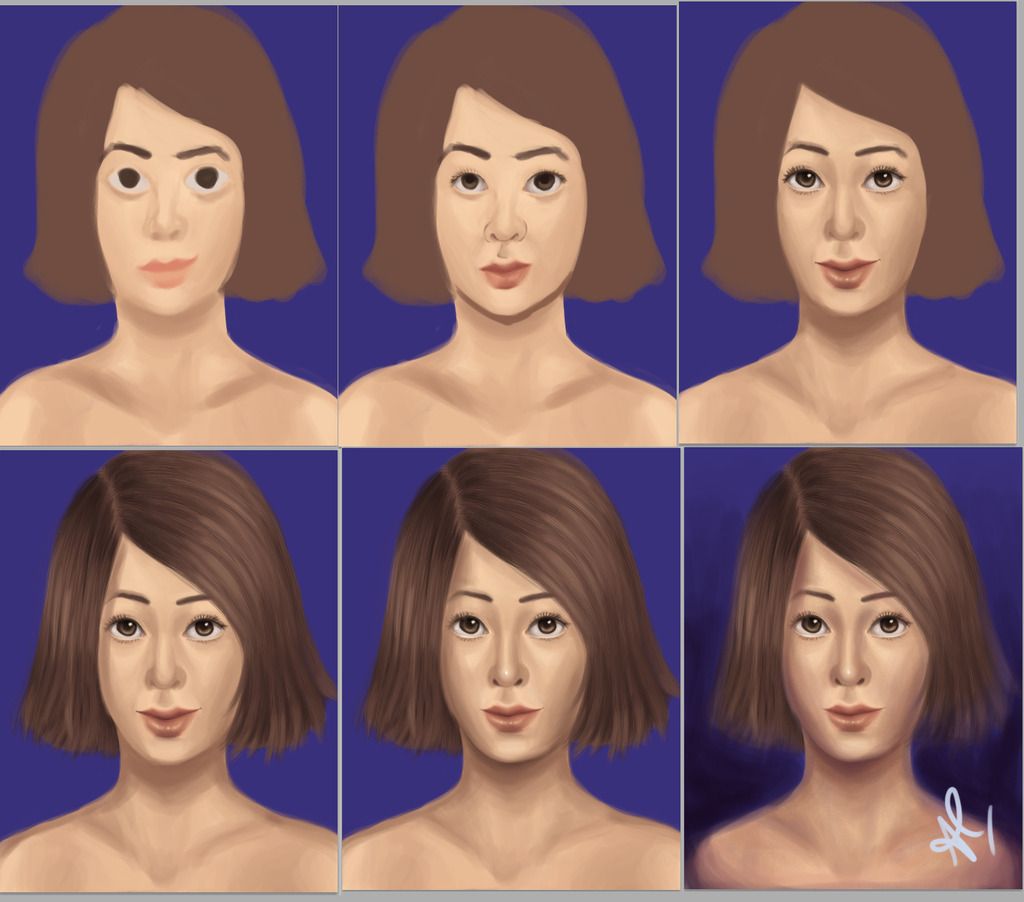 Explanation: Step 1: Blocking I block out the main shape of the face. In this step, I do a very rough drawing of my face structure and paying attention to the proportions. Step 2: Edgework In this step, I started to pay attention to the general form of the face and also add some dark shadows to increase the picture contrast. Step 3: Detail The next thing to do is to create the detail of the face. I usually started out from the eyes and aggressively focus on the eyes, since eyes are the main focal point of the portrait. I also start to repair the nose (I'm bad at nose drawing, so yeah) Step 4: Hair I created the hair with a hair custom brush. I also use the mixture of photoshop round brush to create a more realistic look. Step 5: Repair In this step, I flip the image and find out lots of mistakes that is pretty funny to recognize. I decided to just fix some of them and flip back the image. Tip: It's easier to find mistakes by flipping the image! Step 6: Background At this step, I start to work out with the background and try to blend the render/the girl with the background itself. At first, it's challenging to do this, but with some trial and error I finally able to match those two elements up. Step 7: Final Polishing The last one! I adjust the background and add up some highlights. --- And here's the portrait result: 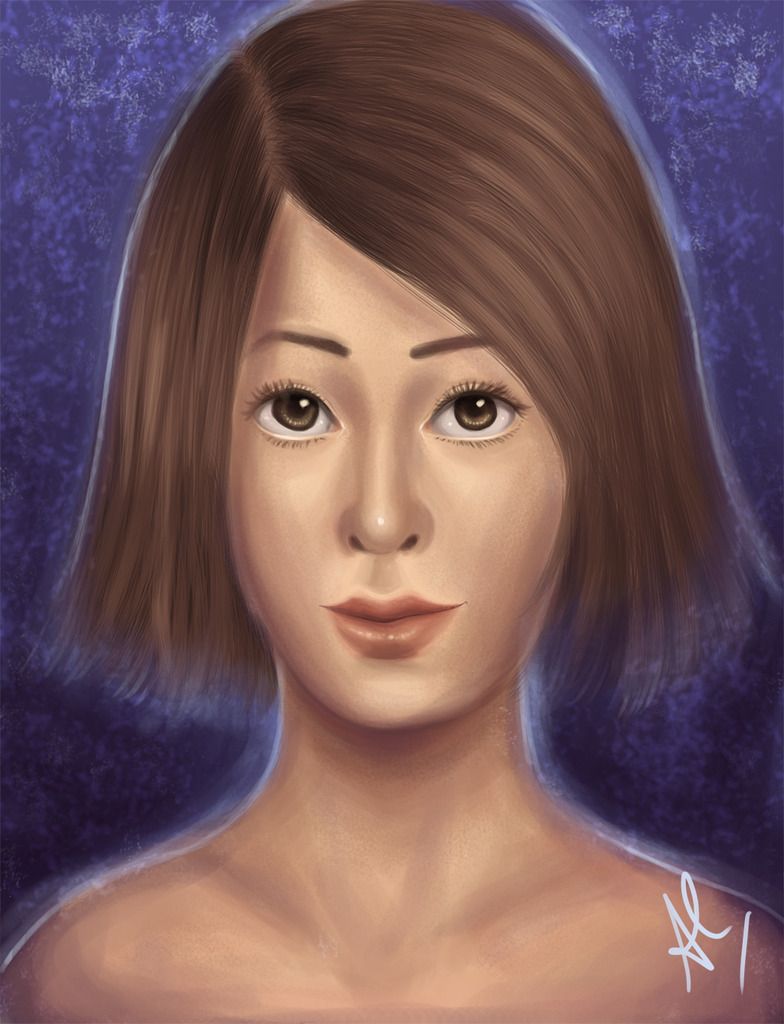
Last edited by Alyce Natalie; 03-15-2017 at 05:46 PM. |
|
#79
03-19-2017, 02:50 AM
|
||||
|
||||
|
Wow, that was very interesting to see all the steps, it sure is a long process.
 Your new portrait drawing looks amazing as always. Do you ever use photos or other drawings as references? Your new portrait drawing looks amazing as always. Do you ever use photos or other drawings as references?
__________________
|
|
#80
03-20-2017, 01:38 PM
|
||||
|
||||
|
That is excellent! It must have taken a long time. I am impressed.
__________________
 signature by the talented _Stormy_ (I am the other Stormy!) |
|
#81
03-27-2017, 06:48 PM
|
||||
|
||||
|
Same here. That's impressive!
__________________
 |
|
#82
04-01-2017, 10:47 AM
|
||||
|
||||
|
Quote:
Quote:
Quote:
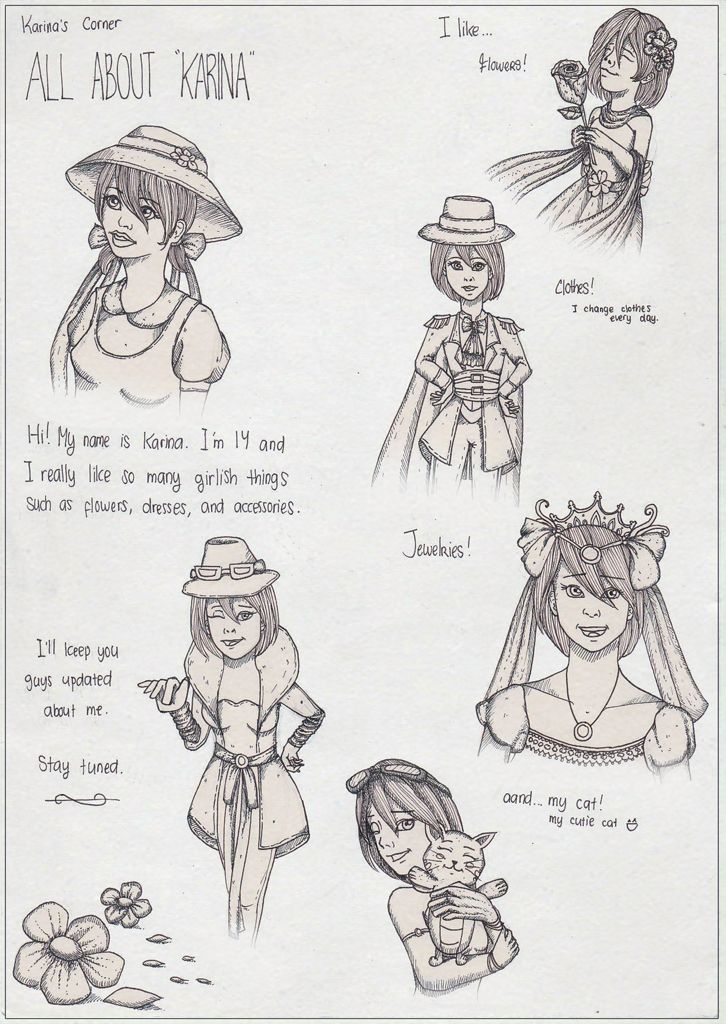
I got bored so I update the banner and also making this one: 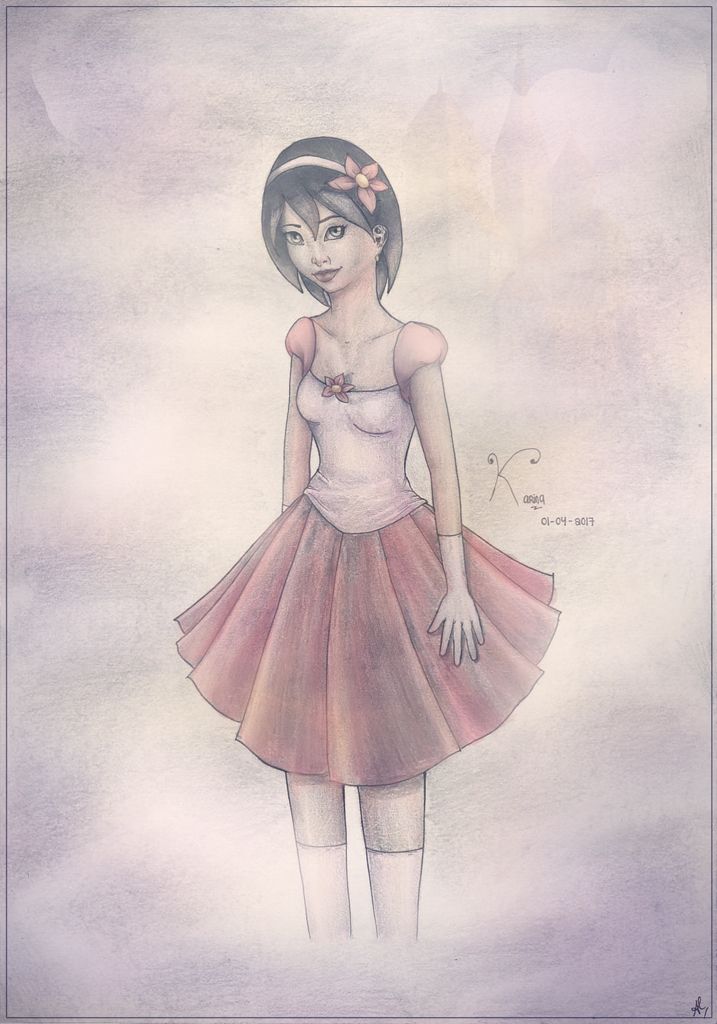 The result came out terribly, I should've tried to ink more... That's my OC Karina (remember the purple portrait drawing? I decided to remake her in colored version). The castle background isn't belong to me, that's a stock image that I found in the internet. 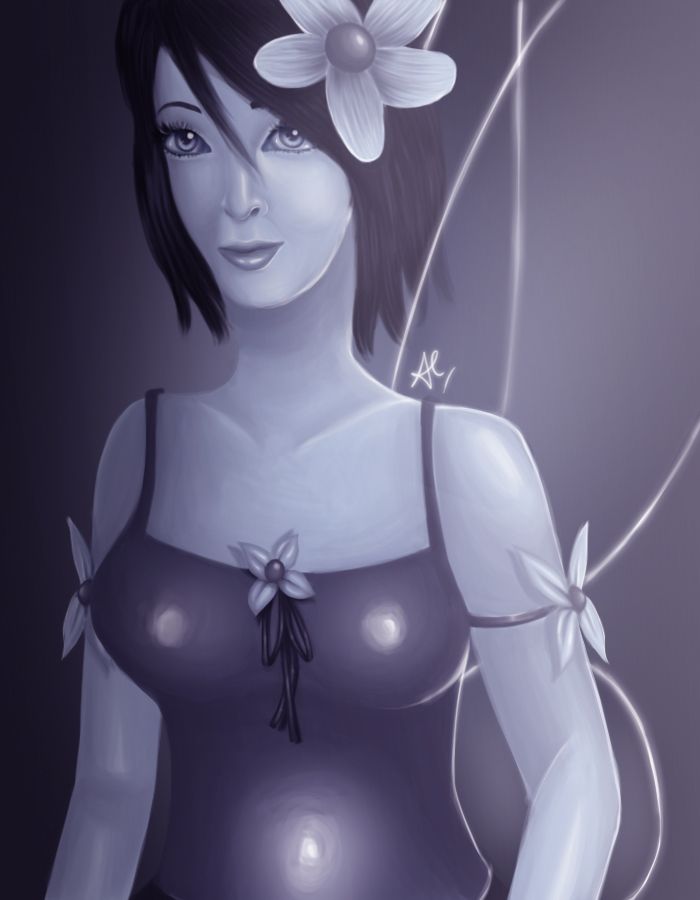
|
|
#83
04-07-2017, 04:46 PM
|
||||
|
||||
|
At least my OC looks good enough...
  Well... yeah I'm practicing on cross hatching. It's really fun thing to do beside shading. |
|
#84
04-09-2017, 09:00 AM
|
||||
|
||||
|
Very cool, Alyce.
 Love how you explore different art techniques, this one was a nice surprise! Love how you explore different art techniques, this one was a nice surprise!
__________________
|
|
#85
06-16-2017, 06:58 AM
|
||||
|
||||
|
Quote:
 --- Whoops, I haven't posted for a while. School had made me so busy for a while, and now I'm back! Here's the picture that I'm working on right now: 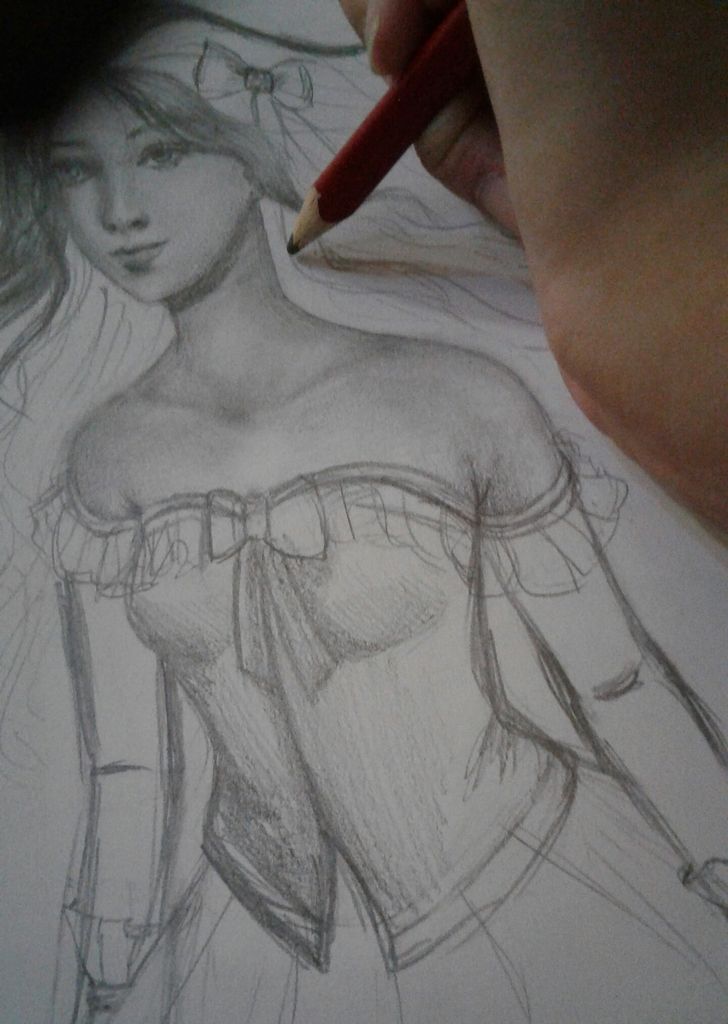
|
|
#86
06-19-2017, 12:45 PM
|
||||
|
||||
|
And here's the finished product:
 I'm going to draw the other one. |
|
#87
06-20-2017, 06:36 PM
|
||||
|
||||
|
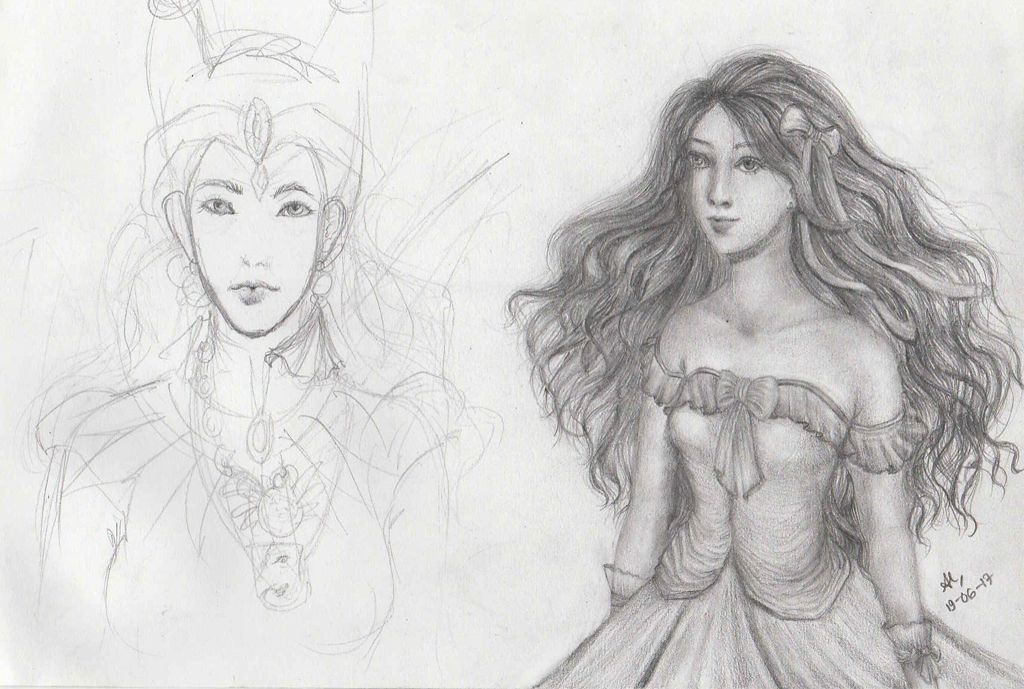
The sketch picture is still in progress. Meanwhile, since I got bored for a while in traditional art, I decided to do a digital art instead. I do a practice in doing a portrait.
The leather texture is one of the stock images I found on the internet. A pirate. 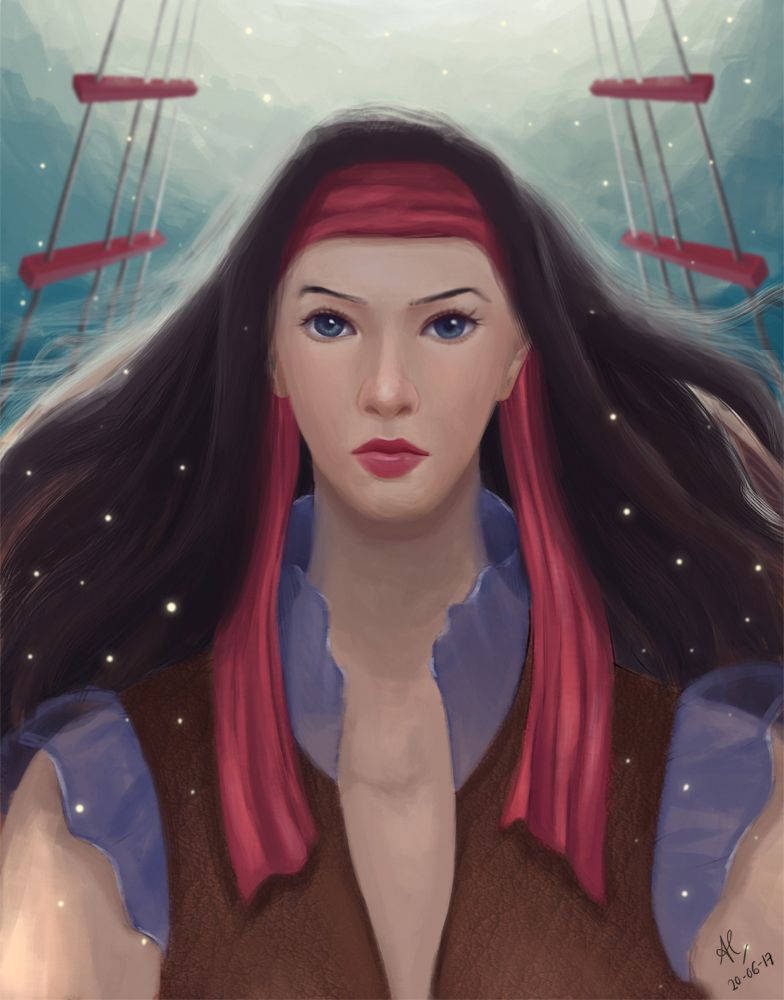
|
|
#88
06-21-2017, 02:01 PM
|
||||
|
||||
|
I'm not really happy with the final results, but here it is:

|
|
|
|


 Linear Mode

